
Dental caries, commonly known as tooth decay, remains one of the most widespread oral health problems across the globe. It can affect people of all ages, from toddlers to the elderly. Although advances in preventive dentistry and treatment have significantly reduced its burden, dental caries continues to challenge dentists due to its complex nature and the variety of factors that contribute to its development.
One of the most important aspects of managing caries is early diagnosis. When detected early, carious lesions can often be arrested, slowed down, or even reversed without the need for restorative treatment. On the other hand, delayed detection may lead to cavitation, pain, infection, and ultimately loss of the tooth. This makes accurate and timely diagnosis essential in everyday clinical practice.
Table of Contents
ToggleWhy Early Diagnosis Matters
Dental caries is a dynamic process involving demineralization of tooth structure by acids produced from bacterial metabolism of dietary sugars. Fortunately, teeth also undergo natural remineralization through saliva, fluoride, and preventive interventions.
If a lesion is detected early—before the tooth surface has broken down—it is often possible to arrest or even reverse the process. Preventive measures such as improved oral hygiene, fluoride application, dietary counseling, and sealants can be highly effective.
If the lesion is diagnosed late and cavitation has already occurred, preventive strategies alone are not enough, and restorative treatment becomes necessary. Therefore, the diagnostic process directly influences whether the dentist chooses prevention or restoration.
Aids to Diagnosis
Dentists rely on a combination of visual inspection, tactile sensation, radiographs, and advanced technologies to diagnose caries. Each method has its strengths and limitations, and often they are used together to arrive at the most accurate conclusion.
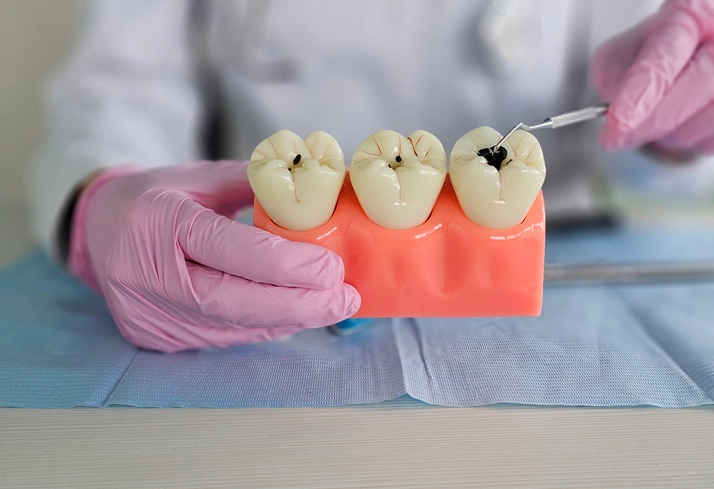
1. Visual Inspection
Good eyesight is the most basic and essential diagnostic tool. The tooth must be clean, dry, and well illuminated. A mouth mirror and adequate lighting are indispensable.
Magnification tools, such as dental loupes (usually ×2 to ×6 magnification), enhance visibility, especially when examining fine details like early enamel changes. Although loupes help, simply leaning in closer with the naked eye can sometimes be adequate, particularly in resource-limited settings.
Key things to look for:
- Changes in color (white spot lesions, brown discoloration).
- Changes in texture (roughness or loss of luster).
- Presence of cavitation (visible hole).
2. Tactile Examination
Traditionally, a sharp dental explorer was used to “stick” into fissures to detect soft areas. However, this method is discouraged today. Forcing the probe into the fissure can cause cavitation in a demineralized but non-cavitated surface, essentially turning a reversible lesion into an irreversible one.
Instead, a blunt probe should be used gently across the fissures and smooth surfaces. The dentist is looking for softness, roughness, or loss of surface integrity—not trying to puncture the enamel.
3. Radiographic Examination
Bitewing radiographs are the standard imaging tool for detecting interproximal (between teeth) caries and also useful for occlusal caries in some cases.
How to use them effectively:
- Examine systematically, one contact area at a time, across the arch.
- Start by checking enamel involvement, then move on to dentine.
- Compare both sides of the arch for symmetry.
Limitations:
- Early lesions may not be visible radiographically.
- Clinical inspection can sometimes show more advanced lesions than the radiograph suggests.
Therefore, radiographs must always be interpreted in conjunction with clinical findings.
4. Fibreoptic Transillumination (FOTI)
FOTI involves shining a bright light through the tooth. Demineralized areas scatter light differently than sound enamel, making carious lesions appear as shadows.
Advantages:
- Non-invasive and radiation-free.
- Particularly useful for approximal caries.
Limitations:
- Requires experience to interpret shadows accurately.
- Works best as an adjunct to radiographs rather than a replacement.
5. Advanced Diagnostic Aids
In recent years, newer technologies have been introduced to provide more objective readings.
- Laser fluorescence devices (e.g., DIAGNOdent®): Detect bacterial metabolites in caries and give a numerical score indicating the likelihood of decay.
- Impedance-based devices (e.g., CarieScan PRO®): Measure changes in tooth electrical conductivity caused by demineralization.
These instruments can help in early detection, but they are best used as supplements, not substitutes, for conventional methods.
Types of Carious Lesions and Their Diagnosis
Different surfaces of teeth present different diagnostic challenges. Let’s look at each type:
1. Smooth Surface Caries
- Usually occurs on the sides of teeth or near the gumline.
- Relatively easy to detect because the surface is visible and accessible.
- Appears as white spots (early stage) or brown lesions (later stage).
- If cavitated, restoration is needed. If not, preventive care may suffice.
2. Pit and Fissure Caries
- Found on the chewing surfaces of molars and premolars.
- Difficult to diagnose because the grooves and fissures naturally trap stains and debris.
- Probing is unreliable and potentially damaging.
- Radiographs may not always show early fissure caries.
Best approach:
- Use visual inspection with magnification.
- If high risk, apply fissure sealants rather than waiting for progression.
- Monitor carefully for signs of cavitation.
3. Approximal Caries
- Occur between teeth, hidden from direct view.
- Detected primarily with bitewing radiographs and sometimes with FOTI.
Management guidelines (simplified):
- Confined to enamel: Preventive care and monitoring.
- Extended into dentine: Restoration is generally indicated.
- Uncertain cases: Use orthodontic separators for 3–7 days to create space and visualize directly.
Relevance to Management
The diagnostic outcome directly guides treatment decisions.
- Non-cavitated lesions: Prevention is the key. This may include fluoride applications, dietary advice, oral hygiene instruction, and sealants.
- Cavitated lesions: Restoration is required to prevent further destruction and to restore function.
An important aspect is patient communication. Patients should be counseled that if their lesion is not yet cavitated, it has the potential to stop progressing with proper care. This encourages them to take preventive advice seriously.
Recall Intervals: How Often Should Patients Be Seen?
One of the most debated topics in preventive dentistry is how frequently patients should attend dental check-ups.
Traditional Approach
Historically, dentists recommended 6-monthly check-ups for everyone. This routine was simple but not evidence-based for all patients. Many low-risk individuals could safely attend less frequently, while high-risk individuals needed more frequent monitoring.
Current Understanding
Research shows that recall intervals should be individualized based on risk assessment.
- High-risk patients: Every 3–6 months. Examples include those with poor oral hygiene, high sugar intake, history of multiple cavities, or reduced saliva flow.
- Moderate-risk patients: Every 6–12 months.
- Low-risk patients: Every 12–24 months may be sufficient if no problems are present.
Children
- First check-up: within 6 months of the first tooth erupting (usually between 6 months and 1 year of age).
- Thereafter: between 3 and 12 months depending on risk.
Adults
Recommended interval: between 3 and 24 months, depending on caries risk, oral hygiene, and lifestyle factors.
In the UK, the National Institute for Health and Care Excellence (NICE) provides guidelines supporting risk-based recall intervals instead of a fixed 6-month rule.
Controversies and Challenges
While recall intervals and diagnostic methods are well established, several controversies remain:
- Overdiagnosis vs. underdiagnosis: New technologies may identify very early lesions that would never progress, leading to unnecessary interventions. On the other hand, missed lesions can have serious consequences.
- Patient compliance: Even with accurate diagnosis, if patients do not follow preventive advice, lesions may still progress.
- Cost and accessibility: Advanced diagnostic devices are expensive and may not be available in all clinics.
Practical Tips for Clinicians
- Always start with clean, dry, well-lit teeth.
- Use a blunt probe gently; avoid causing damage.
- Interpret radiographs carefully and systematically.
- Consider using FOTI or advanced tools for difficult cases.
- Differentiate between non-cavitated and cavitated lesions clearly.
- Tailor management based on risk assessment and lesion type.
- Communicate effectively with patients—emphasize that prevention works best before cavitation.
- Decide recall intervals individually, not as a one-size-fits-all approach.
Conclusion
Caries diagnosis is both an art and a science. It involves careful observation, thoughtful use of diagnostic tools, and a strong understanding of the caries process. Early detection can prevent unnecessary restorations, save natural tooth structure, and improve long-term oral health.
A simplified takeaway:
- Look carefully, diagnose early, prevent whenever possible.
- Restore only when necessary, and always emphasize prevention.
- Tailor recall intervals to the patient, not the calendar.
With these principles, dentists can make a real difference in reducing the burden of dental caries in their communities.