
Dental tray set-ups play a pivotal role in the efficiency and success of dental procedures. These meticulously organized trays, holding an array of sterilized instruments, are crucial for dental professionals to navigate through various treatments seamlessly. In this detailed guide, we will delve into the step-by-step process of preparing dental tray set-ups, emphasizing the importance of precision and organization in providing optimal dental care.
Understanding the Significance
Dental tray set-ups act as a fundamental tool for storage and organization in dental care. Before each patient examination, oral health professionals meticulously arrange the required instruments on a tray. This not only enhances the efficiency of dental practices but also ensures that dentists can deliver high-quality care while saving valuable time.
Materials and Construction
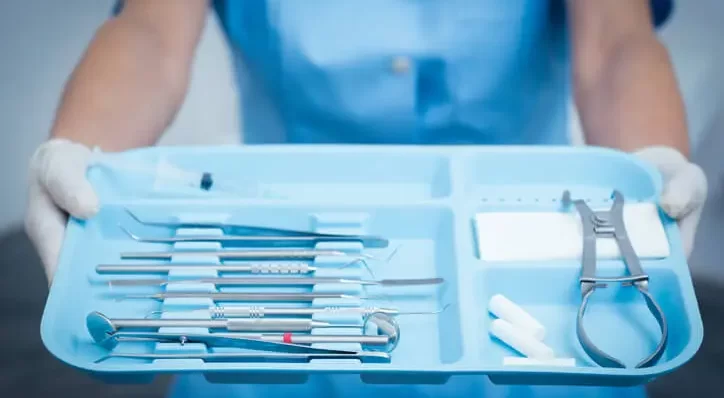
Dental trays are commonly crafted from easily sterilizable materials such as stainless steel. They are designed with raised edges to prevent instruments from slipping or falling during procedures. Dental Assistants (DAs) play a crucial role in organizing these trays, ensuring that sterilized instruments are grouped by procedure type, facilitating quick access for other dental professionals.
Dental Tray Set-Ups Definition
Preparing tray set-ups is a routine task performed by Dental Assistants for each patient’s room. The standard arrangement of dental instruments includes dental mirrors, cotton pliers, periodontal probes, suction holders, and hemostats. Additionally, surgical scissors, retractors, and scalpels are essential tools for more advanced procedures.
Purpose of Dental Tray Set-Ups
The preparation of dental trays serves several critical purposes:
- Smooth Dental Processes
- Assistance in Examinations
- Time Efficiency
Smooth Dental Processes
Properly arranged trays contribute to the predictability and smooth execution of dental procedures.
Assistance in Examinations
Dental tray set-ups assist dentists and dental hygienists before patient examinations, ensuring they have the necessary tools at their fingertips.
Time Efficiency
The meticulous organization of trays optimizes the efficiency of the dental team, ultimately benefiting both practitioners and patients.
Duration of Dental Tray Set-Up
Typically, preparing a tray set-up takes approximately 5 to 10 minutes. During this time, Dental Assistants gather necessary supplies, ensure sterilization, and arrange instruments on the tray. It’s common for DAs to prepare trays for multiple examination rooms, showcasing the importance of time management in dental practices.
Responsibilities and Training
Dental Assistants are often tasked with the responsibility of preparing tray set-ups for dentists and dental hygienists. Despite its seemingly straightforward nature, this task is integral to the success of dental examinations. DAs also contribute to the overall efficiency of the dental team by preparing the examination room.
Training requirements for tray set-ups vary, depending on location and profession. While some may learn through on-the-job training, Dental Assistants typically graduate from accredited programs and pass relevant exams. These programs, accredited by the Commission on Dental Accreditation (CODA), provide a blend of clinical and classroom instruction.
Mastering the Dental Tray Set-Up Procedure
Proficiency in tray set-ups requires both time and practice. Understanding the proper set-up procedures is crucial for Dental Assistants to excel in their roles. Here are key steps to follow:
- Preparation
- Orderly Placement
- Top Placement for Cotton Supplies
- Strategic Placement of Hinged Instruments
- Maintain Order
- Cleaning and Sterilization
Preparation
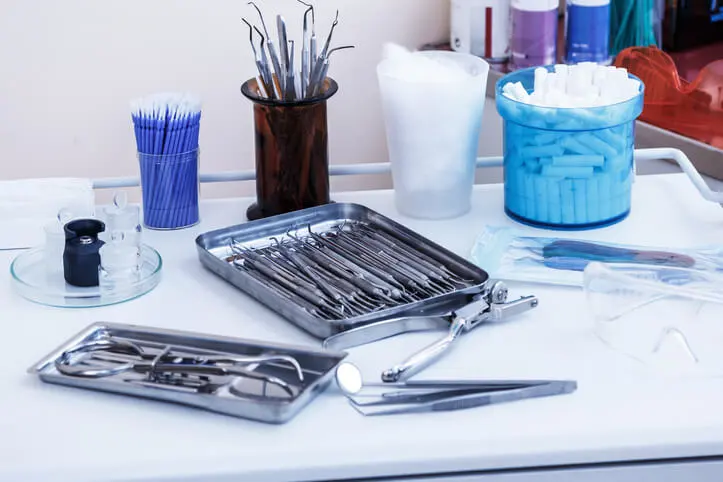
Have supplies ready and familiarize yourself with your employer’s procedures, including their sterilization processes.
Orderly Placement
Place instruments on the tray in the order of use, from left to right. Group instruments based on their functions.
Top Placement for Cotton Supplies
Arrange cotton supplies across the top of the tray.
Strategic Placement of Hinged Instruments
Position scissors, hemostats, and other hinged instruments on the right-hand side for easier access.
Maintain Order
Return instruments to their original positions promptly to ensure easy retrieval if needed again.
Cleaning and Sterilization
Clean instruments and remove debris before placing them back on the tray. Follow proper cleaning and sterilization procedures after the patient’s examination.
Necessary Equipment for Tray Set-Ups
Typically, a tray set-up includes the following essential items:
- Dental mirrors
- Cotton pliers
- Periodontal probe
- Hemostat
- Suction holder
- Surgical scissors
- Retractors
- Scalpels
Patient Comfort Consideration
Consider the comfort of the patient when setting up the dental tray. For example, if a procedure involves prolonged periods of keeping the mouth open, having a comfortable bite block or mouth prop readily available can enhance the patient’s experience.
Risks and Complications
Inadequate tray set-ups pose risks such as time loss and potential spread of infections. Delays may occur if the correct equipment is not assembled, and improper sterilization can lead to the transmission of germs, causing viral or bacterial infections.
Pro Tips for Tray Set-Up Mastery
To master the art of tray set-ups, Dental Assistants should consider the following pro tips:
- Know Your Instruments
- Left is Best
- Instrument Numbers
- Save the Bib for Last
- Include Floss
- Check Instrument Packets
- Absorb Information
Know Your Instruments
Familiarize yourself with the purpose of each instrument and anticipate the dentist’s needs during a procedure.
Left is Best
Prepare instruments in the order of use, typically arranged from left to right, facilitating a smooth procedure.
Instrument Numbers
Learn the universal part numbers assigned to each instrument by manufacturers. Dentists may refer to these numbers during procedures.
Save the Bib for Last
Place the patient’s bib on top of the instruments after preparing the tray, serving as a reminder to replace it for each patient.
Include Floss
If allowed, add floss to the tray to save time for the dental hygienist and reduce glove changes during the procedure.
Check Instrument Packets
Before sterilization, check the color of the arrow on instrument packets. A change in color indicates proper sterilization.
Absorb Information
Watch videos for visual guidance on tray set-ups, and don’t hesitate to seek help. Mastery comes with time and practice.
Maintain a Sterile Environment
Throughout the tray preparation process, prioritize maintaining a sterile environment. Use sterile gloves when handling instruments, and be mindful of potential sources of contamination. If any instrument or item on the tray becomes contaminated, replace it promptly to uphold infection control standards.
Labeling and Organization
Consider incorporating a labeling system on the tray to identify specific instruments easily. This can be particularly helpful for dental assistants and ensures everyone in the dental team is on the same page regarding the set-up.
Incorporate Ergonomics
When placing instruments on the tray, consider the ergonomics of the dental operatory. Ensure that the tray is positioned within easy reach, minimizing the need for unnecessary movements during the procedure. This not only saves time but also reduces fatigue for the dental practitioner.
Customize for Specific Procedures
Some dental procedures may have unique requirements. For instance, endodontic procedures may require additional files and disinfection solutions. Tailor your tray set-up based on the specific needs of the treatment to enhance efficiency.
Regularly Update Set-ups
As dental technology and procedures evolve, periodically review and update your dental tray set-ups. Incorporate new instruments or techniques as needed, ensuring that your practice stays current with industry advancements.
Importance of Learning Tray Set-Ups
Dental Assistants play a vital role in increasing efficiency and reducing the risk of pathogen exposure by preparing tray set-ups between patients. While not always a strict job requirement, proficiency in tray set-ups is a valuable skill that enhances a DA’s contribution to the dental care team. Pursuing training in this area can lead to increased job opportunities and career growth, ultimately benefiting both the dental assistant and the dental practice. In conclusion, the meticulous preparation of tray set-ups is a cornerstone in providing effective and streamlined dental care.