
Dental veneers are a popular cosmetic solution designed to enhance the appearance of teeth by covering imperfections such as discoloration, chips, or irregular shapes. These thin, custom-made shells, typically composed of porcelain or composite resin, are bonded to the front of teeth, transforming smiles and boosting confidence. A meticulous veneer preparation process is crucial for ensuring durability, functionality, and aesthetics. This article delves into the steps, techniques, and best practices for preparing dental veneers.
Table of Contents
ToggleUnderstanding Dental Veneers
Dental veneers come in two primary types:
Porcelain Veneers
- Highly durable and resistant to staining.
- Offer a natural, translucent appearance similar to real teeth.
- Custom-made in a dental laboratory, ensuring precise fit and aesthetics.
Composite Resin Veneers
- Less expensive and quicker to fabricate.
- Easier to repair compared to porcelain.
- Generally have a shorter lifespan than porcelain veneers.
Importance of Proper Veneer Preparation
Preparation is key to the success of dental veneers. Poorly prepared teeth can lead to complications such as improper fit, gum irritation, or premature veneer failure. Proper preparation ensures:
- Optimal bond strength between the tooth and veneer.
- Natural and seamless integration with surrounding teeth.
- Long-lasting results that maintain functionality and appearance.
Techniques in Veneer Preparation
Veneer preparation techniques have evolved over the years, with a focus on minimally invasive methods that preserve as much of the natural tooth structure as possible. Below are the primary techniques:
- Conventional Veneer Preparation
- No-Prep Veneers
- Digital Veneer Preparation
- Layered Veneers
- Minimal-Preparation Veneers
- Temporary Veneers for Preview
Conventional Veneer Preparation
This traditional technique involves reshaping the tooth surface to accommodate the veneer. It is best suited for cases requiring significant correction of tooth appearance. Key features include:
- Enamel Reduction: Typically, 0.5-1.0 mm of enamel is removed to ensure the veneer fits naturally and securely without appearing bulky.
- Margin Design: Proper shaping of the margin (e.g., chamfer or shoulder design) ensures precise veneer placement and avoids gaps that could compromise aesthetics or function.
No-Prep Veneers
No-prep veneers are ultra-thin veneers applied with minimal or no removal of the enamel. This technique is ideal for patients seeking subtle improvements and where tooth alignment is already optimal. Key points include:
- Preservation of Tooth Structure: This technique avoids unnecessary enamel reduction, preserving the natural strength of the tooth.
- Ease of Reversal: Since enamel removal is limited, these veneers can often be reversed if necessary.
- Limitations: Not suitable for cases requiring significant color or shape changes.
Digital Veneer Preparation
Digital technology is revolutionizing veneer preparation, making the process more efficient and precise. Techniques include:
- Digital Impressions: High-resolution intraoral scanners capture accurate 3D images of the teeth, eliminating the discomfort associated with traditional molds.
- CAD/CAM Veneers: Using computer-aided design and manufacturing, dentists can design and mill veneers in-office, enabling same-day placement.
- Enhanced Accuracy: Digital tools ensure a perfect fit, reducing the need for adjustments and enhancing the overall patient experience.
Layered Veneers
Layered veneers involve multiple thin layers of porcelain or composite resin to achieve a highly natural and aesthetic result. This technique is often used for:
- Custom Shading: Layering allows for precise color matching to adjacent teeth, creating a seamless look.
- Improved Strength: The layering process can enhance durability by distributing stress more evenly across the veneer.
Minimal-Preparation Veneers
A middle ground between conventional and no-prep techniques, minimal-prep veneers require slight enamel removal for cases where minor adjustments are necessary. Advantages include:
- Balanced Approach: Retains most of the natural tooth structure while ensuring a proper fit.
- Versatility: Suitable for a wide range of cases, from minor discoloration to slight shape adjustments.
Temporary Veneers for Preview
Temporary veneers are used to provide patients with a preview of the final results. These are typically fabricated chairside using composite resin or pre-made templates. Benefits include:
- Patient Approval: Allows patients to visualize the outcome and request adjustments before the final veneers are bonded.
- Functional Testing: Helps evaluate comfort and functionality in everyday use.
Steps in Dental Veneer Preparation
1. Initial Consultation
The process begins with a consultation to assess the patient’s needs and determine whether veneers are the right solution. Key steps include:
- Comprehensive oral examination, including X-rays.
- Discussion of aesthetic goals and treatment options.
- Explanation of the veneer procedure, potential risks, and maintenance requirements.
2. Treatment Planning
Once veneers are determined to be suitable, the dentist develops a personalized treatment plan:
- Digital or physical impressions of the teeth are taken to create a mock-up of the final result.
- Shade selection ensures the veneers blend naturally with adjacent teeth.
- Consideration of the patient’s bite and alignment to ensure proper function.
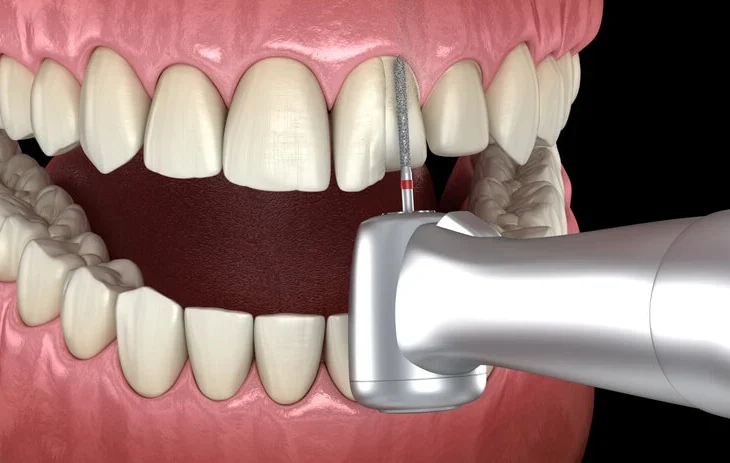
3. Tooth Preparation
Preparation involves reshaping the teeth to accommodate the veneers. This step requires precision to avoid over-preparation, which can weaken the tooth structure. Key aspects include:
- Enamel Reduction: Approximately 0.5 mm to 1 mm of enamel is removed from the front surface of the teeth. This allows the veneers to fit flush and not appear bulky.
- Anesthesia: Local anesthesia may be used to ensure patient comfort, especially for sensitive teeth.
- Temporary Veneers: If the veneers are fabricated in a laboratory, temporary veneers may be placed to protect the teeth and provide a preview of the final outcome.
4. Impression or Scanning
Accurate impressions or digital scans of the prepared teeth are critical for creating custom veneers:
- Traditional impressions use dental putty to capture the tooth shape.
- Digital impressions involve scanning the teeth with advanced imaging technology, offering greater accuracy and comfort.
These records are sent to a dental laboratory where skilled technicians craft the veneers to precise specifications.
5. Veneer Fabrication
The fabrication process typically takes 1-2 weeks. During this time:
- Porcelain veneers are sculpted and layered to mimic the natural translucency and texture of teeth.
- Composite resin veneers can be fabricated chairside for same-day results in some cases.
6. Veneer Bonding
Once the veneers are ready, the bonding process ensures a secure and lasting attachment:
- Trial Fitting: The dentist places the veneers on the teeth to check fit, color, and alignment. Adjustments can be made as needed.
- Surface Preparation: The teeth are cleaned, polished, and etched to create a rough surface, enhancing the bond.
- Bonding Cement: A special adhesive is applied to the veneer, which is then positioned on the tooth. A curing light activates the adhesive, securing the veneer in place.
- Final Adjustments: The dentist ensures the bite is comfortable and smooths out any irregularities.
Best Practices for Veneer Preparation
- Conservative Enamel Reduction: Minimize enamel removal to preserve tooth strength and reduce sensitivity.
- Accurate Impressions: Use high quality materials or advanced digital technology to ensure precision.
- Patient Communication: Set realistic expectations and involve the patient in decisions about shade and design.
- Proper Adhesive Protocols: Ensure the bonding surface is free of contaminants to achieve maximum adhesion.
Post-Procedure Care
After the veneers are placed, patients must follow specific care instructions to maintain their longevity:
- Oral Hygiene – Brush and floss regularly, focusing on gentle techniques to avoid damaging the veneers.
- Dietary Considerations – Avoid biting into hard objects or consuming foods that can stain.
- Regular Dental Visits – Schedule check-ups to monitor the condition of the veneers and underlying teeth.
- Nightguards – Patients who grind their teeth may need custom night guards to protect the veneers.
Common Challenges and Solutions
- Tooth Sensitivity – Temporary sensitivity can occur after enamel reduction. Using desensitizing toothpaste or fluoride treatments can help.
- Color Mismatch – Ensure precise shade matching during preparation and fabrication stages.
- Chipping or Cracking – Avoid excessive force on veneers. Repair or replacement can address damage.
Frequently Asked Questions (FAQs)
1. How long do dental veneers last?
Porcelain veneers typically last between 10 to 15 years with proper care, while composite resin veneers last about 5 to 7 years.
2. Does getting veneers hurt?
Most patients experience minimal discomfort as the procedure is often performed under local anesthesia. Mild sensitivity may occur after preparation but typically subsides within a few days.
3. Can veneers be whitened?
No, veneers do not respond to traditional teeth whitening treatments. If whitening is needed, it should be done before veneer placement to ensure a color match.
4. Are veneers reversible?
No-prep veneers are often reversible, but conventional veneers require enamel removal, making them a permanent treatment.
5. What can I eat with veneers?
While veneers are durable, it’s best to avoid very hard foods like ice, hard candies, or nuts to prevent chipping. Sticky foods should also be consumed cautiously.
6. Will my veneers look natural?
Yes, high-quality veneers are designed to mimic the natural appearance of teeth. Porcelain veneers, in particular, provide a translucent effect similar to real enamel.
7. Do veneers require special care?
Routine oral hygiene, including brushing twice daily and flossing, is sufficient. Avoiding habits like nail-biting and teeth grinding can prolong veneer longevity.
8. How much do dental veneers cost?
Costs vary depending on material, location, and dentist expertise. Porcelain veneers typically range from $900 to $2,500 per tooth, while composite veneers range from $250 to $1,500 per tooth.
9. Can veneers fix crooked teeth?
Veneers can improve the appearance of mildly misaligned teeth, but severe cases may require orthodontic treatment before veneer placement.
10. What happens if a veneer falls off?
If a veneer becomes loose or falls off, contact your dentist immediately. Avoid trying to reattach it yourself, as this may cause further damage.
Conclusion
Dental veneer preparation is a meticulous process that demands expertise and attention to detail. By understanding and applying the various preparation techniques, dentists can achieve superior aesthetic and functional outcomes. Whether employing conventional methods or leveraging advanced digital technologies, the goal remains the same: a confident, radiant smile that stands the test of time.