
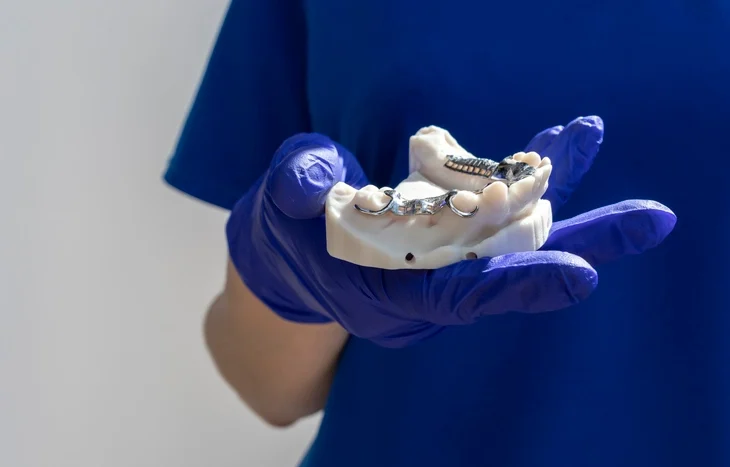
Removable partial dentures (RPDs) play a vital role in restoring function, aesthetics, and oral health in partially dentate patients. Their design and fabrication require a deep understanding of biomechanics, oral anatomy, patient needs, and prosthodontic principles. Unlike fixed prostheses, RPDs rely on a combination of tooth support, mucosal support, and mechanical retention, making their planning complex yet rewarding.
Table of Contents
ToggleIntroduction to Removable Partial Denture Design
The successful fabrication of a removable partial denture begins long before clinical procedures. RPD design is a deliberate, analytical process based on diagnostic study casts that are mounted and surveyed. The purpose of design is to create a prosthesis that is functional, retentive, hygienic, comfortable, and durable, while minimizing stresses on supporting structures.
Unlike complete dentures that rely entirely on mucosal support, RPDs obtain support, stability, and retention from remaining natural teeth. Thus, evaluating abutment teeth, periodontal condition, undercuts, and occlusion is essential before designing the prosthesis.
A well-designed RPD must:
- Replace missing teeth aesthetically and functionally
- Protect abutment teeth and soft tissues
- Provide adequate retention and stability against dislodgement
- Allow ease of insertion and removal
- Distribute forces evenly during function
- Facilitate oral hygiene and maintenance
Designing an RPD requires using a dental surveyor to analyze cast geometry and select an optimal path of insertion, thereby ensuring that undercuts, guide planes, and clasp systems work harmoniously.
Surveying: Foundation of RPD Design
Surveying is a mechanical and visual analysis of the diagnostic cast to identify contours and undercuts essential for planning the RPD framework.
Objectives of Surveying
- Establish the path of insertion and withdrawal
The path must allow the RPD to be inserted without interference from proximal surfaces, soft tissues, or tooth inclinations. - Identify useful undercuts
These will be engaged by direct retainers (clasps) to provide retention. - Identify undercuts that require blockout
Unfavorable undercuts can cause insertion issues, food trapping, or tissue trauma and may require waxing or modifying.
Selecting the Path of Insertion
If teeth exhibit normal anatomy and are upright, the optimal path of insertion aligns perpendicularly to the occlusal plane. However, when teeth tilt, when there are large edentulous spaces, or when undercuts must be maximized for retention, an angled path may be preferable.
Survey lines (height of contour) are marked using a surveyor, indicating the greatest bulge of each tooth. These lines help determine ideal clasp positions and guide plane areas.
Principles of RPD Design
A sophisticated RPD design balances many interrelated elements: saddles, support, retention, stability, connectors, and aesthetics. Each component must be thoughtfully selected.
1. Outline of Saddles
The saddle represents the area that will carry the artificial teeth and rest upon the mucosa. Saddle design varies depending on whether the edentulous area is bounded (tooth on both sides) or free-end (tooth on one side only).
If the edentulous span is small (e.g., less than half a tooth width), replacement may be unnecessary unless aesthetics or occlusion demand it.
2. Planning Support
Support refers to resistance against vertical loading toward the tissue. Support can come from:
- Tooth-borne support – via occlusal, cingulum, or incisal rests
- Mucosa-borne support – via denture base resting on soft tissue
- Combination support – most common in free-end saddles
Tooth Support
Preferred whenever possible because:
- Teeth can withstand occlusal loads better than mucosa
- Support is more predictable and stable
- It prevents accelerated residual ridge resorption
Mucosal Support
Required in:
- Free-end saddle areas
- Large edentulous spaces
- Cases where abutment teeth are absent or unsuitable
However, mucosal support is less reliable due to varying compressibility and changes caused by resorption.
3. Assessing the Denture’s Role
Before finalizing the design, the clinician must assess:
- The function of the denture (aesthetic, functional, occlusal support)
- Saddle length and location
- Occlusal relationship
- Remaining tooth prognosis
- Root surface area available
- Opposing dentition (natural teeth vs prosthesis)
This evaluation ensures that the denture will not overload teeth or soft tissue and will remain comfortable and functional.
4. Obtaining Retention
Retention prevents the RPD from dislodging in a vertical direction away from the tissues. Retention can be:
A. Direct Retention
Provided by components directly engaging undercuts:
- Clasps (most common)
- Guide planes
- Soft tissue undercut engagement
- Precision attachments
Clasp design
Clasp arms should be placed as far apart as possible to maximize resistance to rotational displacement.
Guide planes create parallel surfaces guiding the RPD in a single predictable path, reducing clasp strain.
Composite resin may be added to reshape abutment teeth and enhance undercut depth.
B. Indirect Retention
Indirect retainers resist rotational forces around the fulcrum line formed during function, particularly important in free-end saddle (Kennedy Class I and II) cases.
Examples include:
- Rests placed anterior to the fulcrum
- Rigid connectors used to counteract rocking motions
5. Bracing and Stability
Bracing resists horizontal or lateral dislodging forces. It is provided by:
- Major and minor connectors
- Rigid portions of clasps
- Maximum extension of saddles
- Proper tooth contact points
Eliminating occlusal interferences improves stability and reduces excessive stress on components.
6. Choosing the Connector
The connector unites the components of the RPD framework.
When selecting a connector:
- Ensure adequate space to avoid occlusal interference
- Maintain distance from gingival margins
- Aim for rigidity to distribute forces evenly
The simplest connector design that fulfills biomechanical requirements is preferred.
Common RPD Design Problems and Solutions
1. Lower Bilateral Free-End Saddle (Kennedy Class I)
This is one of the most challenging RPD designs due to the lack of posterior support and the long lever arm that can place harmful forces on abutment teeth.
Key solutions include:
Maximizing indirect retention
Place rests and clasps on the mesial aspect of abutment teeth
Use a lingual plate for stability
Using altered cast technique
Captures the saddle under functional load, reducing displacement.Reducing leverage
Use smaller, lighter artificial teeth
Extend the denture base optimally
RPI system (Rest–Proximal Plate–I-bar)
Designed to disengage under function, protecting abutment teeth.Stress-breaker designs
Though rarely used, they theoretically reduce harmful forces.Precision attachments
Useful in selected cases but risk overloading abutments.
2. Class IV (Anterior Edentulous Spaces)
Challenges include visible clasps and aesthetic concerns.
Solutions:
- Flanges engaging labial alveolar undercuts can provide hidden retention.
- Avoid distal-facing clasps; mesial clasps reduce rotation.
- Utilize rotational paths of insertion using rigid minor connectors.
- Use interproximal undercuts for “hidden clasps.”
- Acrylic spoon dentures may be considered for minimal display.
3. Multiple Bounded Saddles
Often a horseshoe design works well, especially when guide planes are used for hidden retention.
Clinical Stages in RPD Fabrication
Once the design is finalized, clinical procedures can begin.
1. Assessment and Treatment Planning
Includes:
- Medical and dental history
- Examination of oral tissues, occlusion, and abutment teeth
- Identification of patient expectations
Free-end saddle cases require extra consideration due to support limitations.
2. First Impressions
Usually taken with alginate in a stock tray.
For free-end saddles, the tray may be modified with silicone putty to ensure full capture of the distal extension.
3. Recording Occlusion
If intercuspal position (ICP) is clear and reliable, occlusion can be recorded at the impression appointment.
If ICP is unclear, wax record blocks are required.
Where no teeth contact in occlusion—follow complete denture protocols.
Steps when insufficient standing teeth exist:
- Determine occlusal vertical dimension (OVD) using index marks.
- Define occlusal plane using the record block.
- Check record blocks intraorally.
- Record occlusion with bite paste.
- Check articulated casts match intraoral relationships.
4. Tooth Preparation
May be required to:
- Create rest seats
- Establish guide planes
- Modify unfavourable survey lines
- Create undercuts using composite resin
- Improve prognosis via crowning if needed
Tooth preparation ensures the framework fits precisely and functions effectively.
5. Second Impressions
A customized tray improves accuracy.
Elastomeric materials are preferred.
A wax try-in may be performed before framework fabrication.
6. Try-In of Framework
Evaluate:
- Fit and adaptation of framework
- Position of clasps and rests
- Upper/lower fit individually and together for OVD
- Major errors → repeat impression; minor errors → adjust
When appropriate, select tooth mould and shade.
7. Try-In of Waxed Denture on Framework
Check:
- Denture tooth position
- Flange extension
- Occlusion and OVD
- Aesthetics (essential for anterior cases)
Only proceed once the patient approves appearance.
8. Finishing and Delivery
After laboratory processing:
- Remove surface roughness
- Adjust clasp engagement and undercuts
- Check extension and borders
- Ensure occlusal balance
Provide written and verbal instructions and schedule follow-up.
Rebasing Partial Dentures
Rebasing replaces the denture base while keeping the framework and teeth.
For acrylic partial dentures:
Chairside rebasing is possible, though distortions may occur in undercut areas.
For metal framework dentures:
An impression of the saddle is taken while holding the denture by its framework to avoid errors like increasing OVD.
In cases of extensive wear or damage, fabricating a new denture may be more appropriate.
Conclusion
The design and fabrication of removable partial dentures are complex yet critical in restorative dentistry. A well-designed RPD restores function, speech, aesthetics, and comfort while preserving oral structures. Success depends on a systematic approach involving surveying, thoughtful design decisions, meticulous tooth preparation, and careful clinical procedures.
Clinicians must integrate biomechanical principles, patient-specific considerations, and technical precision to achieve predictable long-term outcomes. Continuous evaluation and adjustment ensure that the RPD remains functional and comfortable as the oral environment changes.
References
- Zarb GA, Bolender CL, Eckert S, Jacob R, Fenton A, Mericske-Stern R.
Prosthodontic Treatment for Edentulous Patients: Complete Dentures and Implant-Supported Prostheses.
13th ed. St. Louis: Mosby; 2013. - Carr AB, Brown DT (Eds.).
McCracken’s Removable Partial Prosthodontics.
13th ed. St. Louis: Elsevier Mosby; 2015.
– The most authoritative textbook on RPD design and clinical procedures. - Shillingburg HT, Hobo S, Whitsett LD, Jacobi R, Brackett S.
Fundamentals of Fixed and Removable Prosthodontics.
3rd ed. Chicago: Quintessence; 1997. - Stewart KL, Rudd KD, Kuebker WA.
Clinical Removable Partial Prosthodontics.
2nd ed. St. Louis: Ishiyaku EuroAmerica; 1993. - Basker RM, Davenport JC, Thomason JM.
Prosthetic Treatment of the Edentulous Patient.
5th ed. Wiley-Blackwell; 2011.
– Contains relevant sections on partial denture support and impression techniques. - Winkler S.
Essentials of Complete Denture Prosthodontics.
2nd ed. Ishiyaku EuroAmerica; 2000.
– Good reference for general concepts of support and occlusion. - Chow TW, Clark RK.
The sectional removable partial denture: a clinical report.
Br Dent J. 1988;164(4):180–184.
– Reference for the sectional denture shown in the figure (in your extracted text). - Frank RP, Nicholls JI.
A study of the flexibility of wrought wire clasps.
J Prosthet Dent. 1981;45:259–267.
– Foundation for understanding clasp design and mechanical properties. - Jacobson TE, Krol AJ.
Rotational-path removable partial denture design.
J Prosthet Dent. 1982;48(3):370–376.
– Authoritative source for RPDs using rotational paths of insertion. - DeVan MM.
The nature of partial denture design.
J Prosthet Dent. 1953;3(4):421–430.
– A classical foundational article introducing design philosophy. - Phoenix RD, Cagna DR, DeFreest CF.
Stewart’s Clinical Removable Partial Prosthodontics.
4th ed. Chicago: Quintessence; 2008. - American College of Prosthodontists (ACP).
Clinical practice guidelines and position statements.
Available at: www.prosthodontics.org
– Up-to-date recommendations on RPD fabrication, maintenance, and materials. - NHS Dental Clinical Guidelines (UK).
Removable Partial Denture design guidelines.
– Useful for impression techniques and clinical sequences. - Grant AA, Johnson W.
Removable Partial Dentures: A Clinician’s Guide.
Oxford University Press; 1992. - Kapur KK.
A clinical evaluation of denture adhesives. Part I: Methods and effects.
J Prosthet Dent. 1967;18(6):550–558.
– Classic work relevant to retention and stability concepts.